Draw Lab Glassware and Apparatus Setups with the MolDraw Apparatus Library
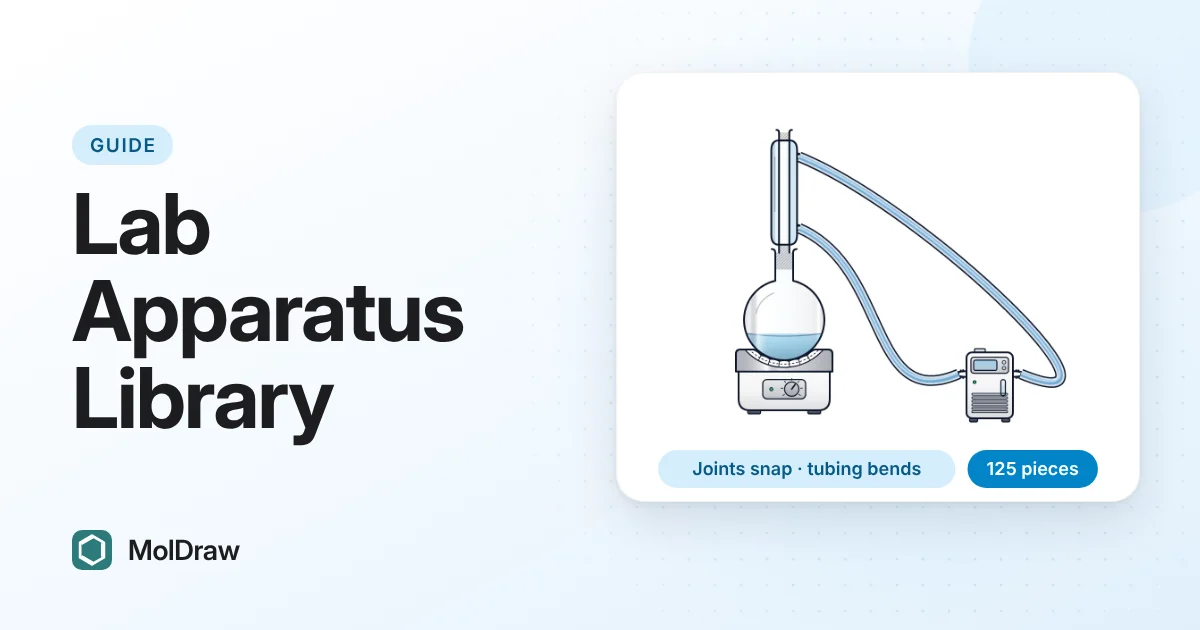
Short answer: In the MolDraw editor, click Apparatus at the right end of the tools row. A library of 125 pieces opens beside the canvas and stays open. Click a card to add it, or drag it onto the canvas. Joints snap together on their own: a condenser fits on a flask neck, and a flask sits on a heating mantle. Use Tubing to connect hose barbs with a hose that you can bend. Then download the drawing as PNG, SVG or PDF.
Why draw apparatus in a structure editor?
Lab manuals, theses, slides and exam papers often need a reaction scheme and a picture of the setup. People usually draw the scheme in one program and the glassware in another, or paste in clip art that does not match. The flasks are the wrong size, the joints do not line up and the water lines are straight sticks.
The MolDraw apparatus library keeps everything on one canvas. The glassware is drawn in the same line weight as your structures, it knows where its joints and hose barbs are, and the pieces connect the way real glassware does. You can draw a full reflux or distillation setup in about a minute, next to the reaction that runs in it.
Open the apparatus library
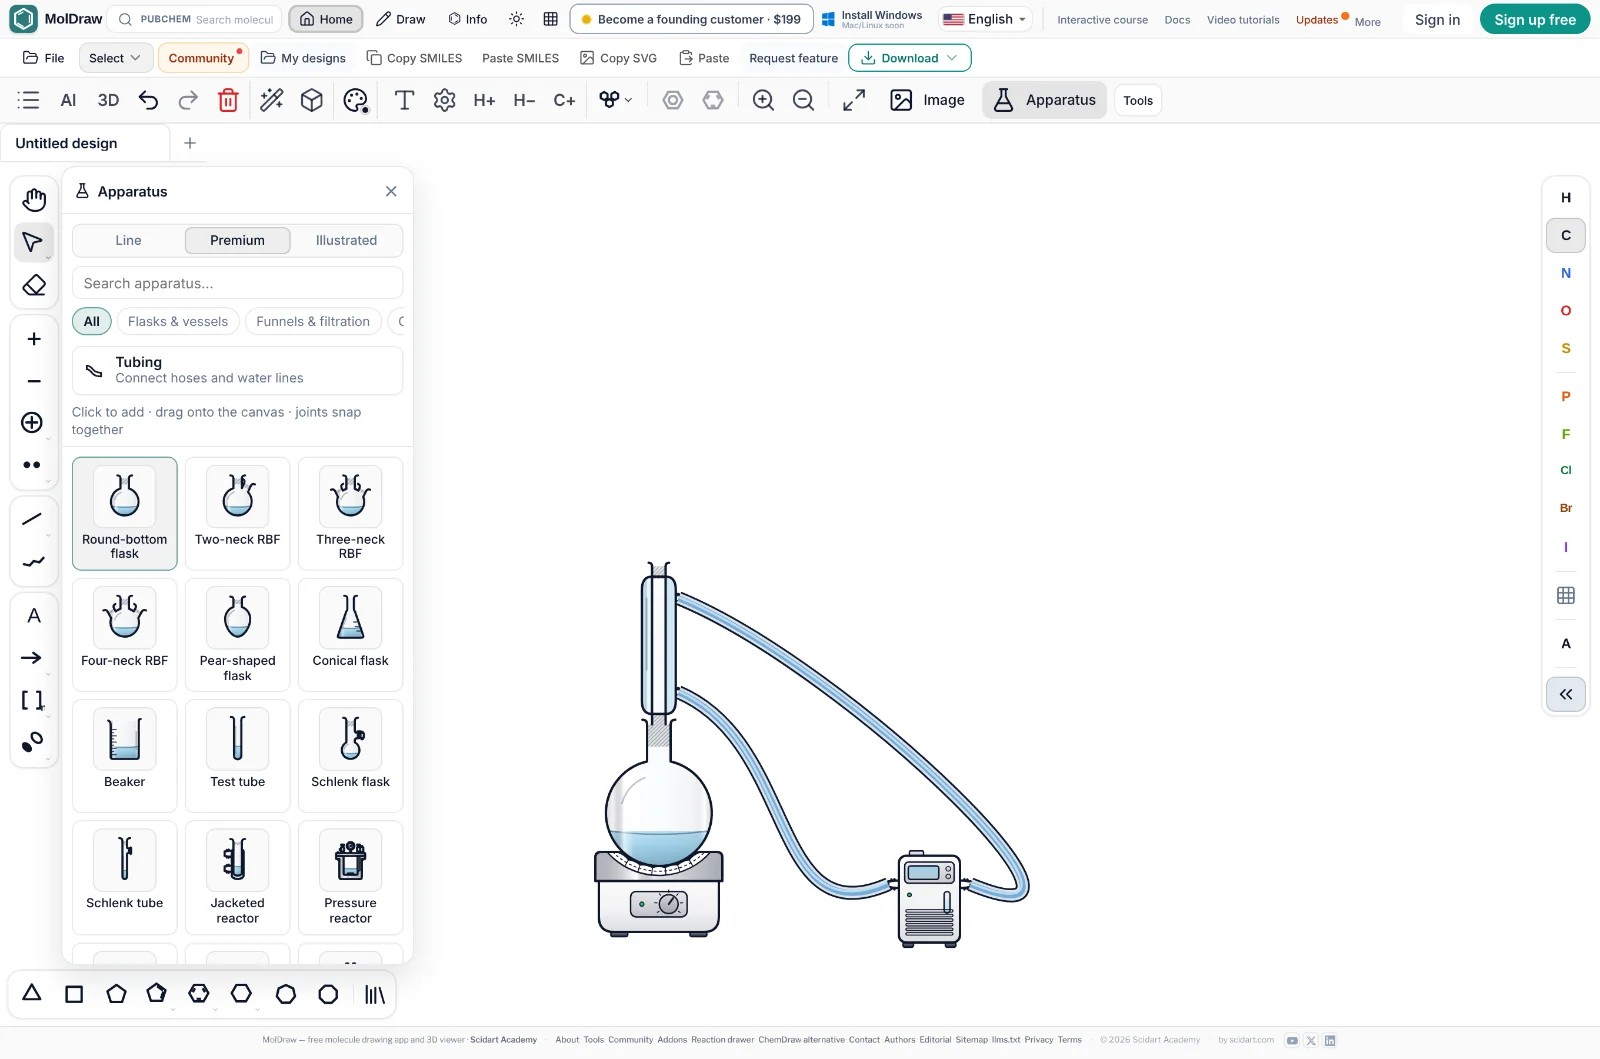
- Open the editor. On a computer, click Apparatus (the flask icon) at the right end of the tools row, next to Image.
- The panel docks on the left, beside the tool rail. It stays open while you work, so you can add a flask, a condenser and a heater one after another. Close it with the × in its header or by clicking Apparatus again.
- Type in the search box to find a piece by name, such as “Dean–Stark” or “Büchner”, or pick a category chip.
On a phone, the library opens as a full-screen sheet. The pieces and features are the same.
What is in the library
There are 125 pieces in nine categories:
| Flasks & vessels | Round-bottom flasks with one to four necks, pear-shaped, conical, Schlenk and volumetric flasks, beakers, test tubes, jacketed and pressure reactors. |
|---|---|
| Funnels & filtration | Filter, separatory, dropping and Büchner funnels, Büchner flasks and filtration setups. |
| Condensers & columns | Straight, Allihn and Dimroth condensers, Vigreux and chromatography columns. |
| Distillation & rotovap | Distillation heads, receiving flasks, Dean–Stark traps, short-path distillation and a rotary evaporator. |
| Adapters & closures | Claisen, bent, reducing, vacuum and thermometer adapters, stoppers and septa. |
| Vacuum, gas & tubing | Schlenk lines, gas bubblers, gas inlet adapters, gas cylinders, vacuum and coolant tubing. |
| Heating & cooling | Heating mantles, hotplate stirrers, oil, sand, ice and dry-ice baths, chillers. |
| Stands, clamps & tools | Retort stands, clamps, rings, spatulas, mortar and pestle. |
| Measuring & analysis | Graduated cylinders, burettes, Pasteur pipettes, thermometers, an analytical balance and TLC chambers. |
Hover over a card to see a large preview. The preview also lists the piece's connections: its joints (for example the neck of a flask), its hose barbs (for example the water inlet and outlet of a condenser) and what it fits on.
Line, Premium and Illustrated styles
- Line draws clean outlines in the same ink as your structures. It suits exam papers, worksheets and journal figures, and it follows the light or dark theme.
- Premium adds soft 3D shading, reflections and glass tint. It suits slides and posters.
- Illustrated places full-colour drawings as pictures. They do not snap or hold liquid, but they are useful for instruments that are not in the line set.
You can switch one piece between Line and Premium later in the format panel.
Click or drag to add pieces
- Click a card to add the piece. If a glassware piece is selected and one of its openings fits, the new piece goes straight onto it. For example, select a flask and click Condenser, and the condenser lands on the flask neck. If nothing is selected, the piece appears in the middle of the visible canvas, and the next one is placed a little offset so pieces do not stack.
- Drag a card onto the canvas to drop the piece exactly where you want it. If you drop it near a free joint, it snaps on.
- The new piece is selected after you add it, so the next click on a card builds on top of it. This makes it quick to stack a flask, a Claisen adapter and a condenser.
How joints snap together
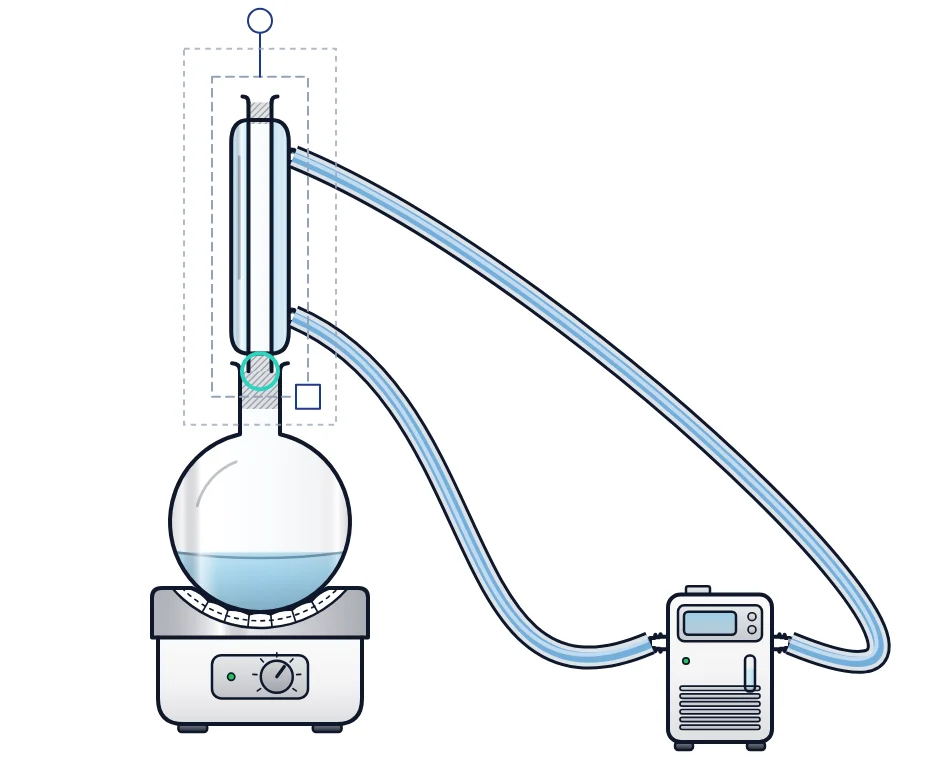
Each piece knows where its openings are and which way they face. When you drag a piece close to a matching opening, MolDraw lines the two up, turning the piece slightly if needed, and shows a green ring at the joint. Release the mouse to fit it.
| Openings | A flask neck, a condenser end or an adapter port connects to another opening that faces it. |
|---|---|
| Bottoms on seats | The bottom of a flask or beaker sits on a seat: a heating mantle, hotplate stirrer, ring, bath, balance pan or stand platform. A flask never snaps by its bottom onto another flask's neck. |
| Hose barbs | Barbs do not snap to glass. Connect them with tubing (see below). |
| Reach | Snapping works within about 20 screen pixels when you drag and 28 when you place a piece, and only if the piece has to turn less than 50°. Zooming in gives finer control. |
| Turn it off | Hold Alt while you drag to move a piece freely. |
Moving a whole selected setup also snaps, but only by sliding it. The setup is never turned, so it stays the way you built it.
Step by step: a reflux setup
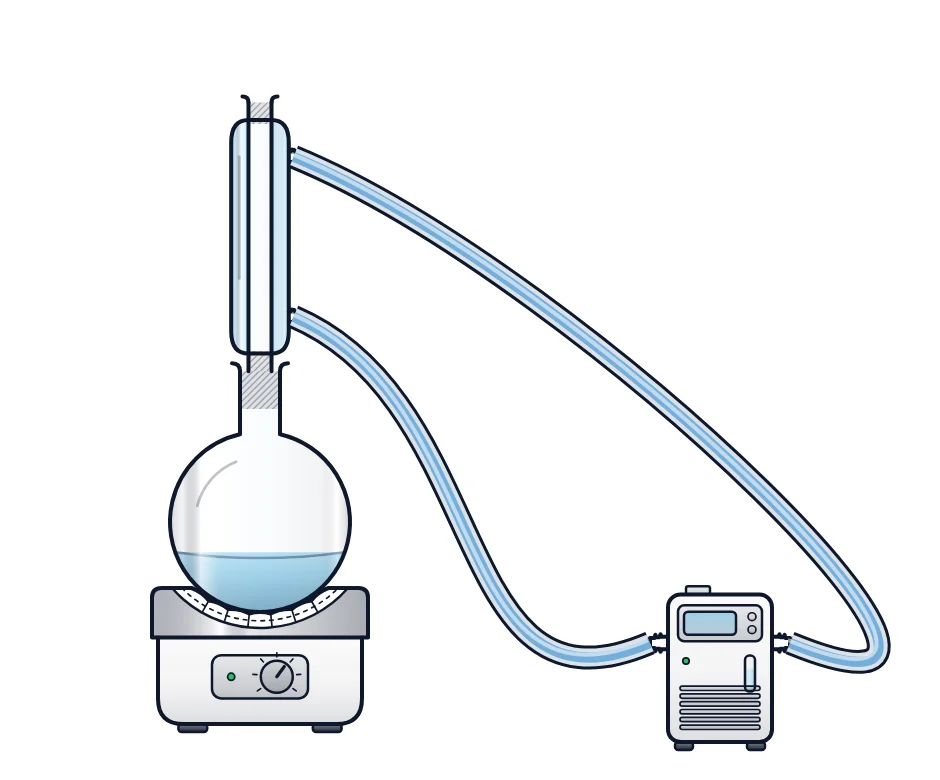
- Open Apparatus and click Heating mantle under Heating & cooling.
- With the mantle selected, click Round-bottom flask. The flask sits in the mantle.
- With the flask selected, click Condenser. It fits on the flask neck.
- Drag a Chiller from the panel to the right of the setup.
- Click Tubing in the panel. Drag from the chiller's outlet to the condenser's lower barb, then from the condenser's upper barb back to the chiller's inlet. Both ends fit on the barbs, and the tubes become water lines.
- Select the flask and drag the grip on the liquid surface to set the level. Add the reaction scheme beside it and export.
The same steps build a distillation (flask, distillation head, condenser, receiving flask), a vacuum filtration (Büchner funnel on a Büchner flask, tubing to a vacuum line) or a Dean–Stark setup.
Liquids: level, colour, tilting and pouring
- Level: select a vessel and drag the small grip on the liquid surface up or down.
- Colour and layers: in the format panel, set the liquid colour and opacity. Add a second layer to show two immiscible liquids, for example in a separatory funnel.
- Tilting: turn a vessel with its rotate handle. The liquid surface stays level and the liquid moves to the low side, as it would in a real flask.
- Pouring: tip a vessel past its lip and the excess pours out in a straight vertical stream. If another vessel is below, the liquid is added to it.
Tubing: connect hoses and water lines
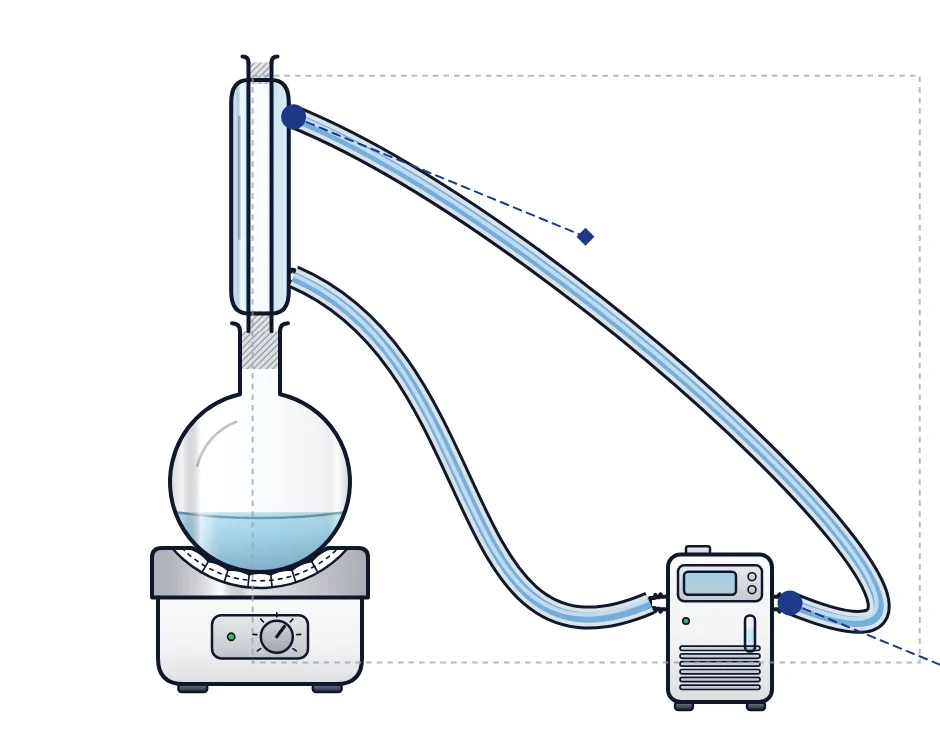
Tubes are drawn as smooth curves (cubic Bézier curves) that leave each barb in the direction the barb points, and hang slightly as a real hose does.
- Click Tubing in the apparatus panel, or pick the tubing tool in the draw panel.
- Drag from one hose barb to another. An end fits on a free barb within reach. An end released away from a barb stays free and shows an open cut end.
- Select the tube to edit it:
- Drag an end (round handle) to move it to another barb, or away to free it. Filled handles are fitted on a barb.
- Drag a curve handle (diamond) to change how the tube leaves that end.
- Drag the body of the tube to bend the whole curve.
- In the format panel, choose the style: rubber (red vacuum hose), water (water line with blue water inside) or clear. You can also change the outline colour and the thickness.
Tubes stay attached. When you move, turn, resize or flip a piece, every tube fitted on it follows. If you delete the piece, the tube ends become free.
Customise the look
Select any piece and open the format panel to change:
- the outline colour and line width, or leave the outline to follow the light or dark theme;
- Line or Premium style, glass tint and reflection highlights;
- graduation marks on cylinders, beakers and burettes;
- the liquid colour, opacity, level and a second layer.
Pieces can be resized, turned, flipped, grouped, duplicated (Ctrl-drag) and nudged with the arrow keys, like any other object.
Export and reuse
- Download the canvas as PNG for slides, SVG for editing in a vector program, or PDF for print.
- Copy the drawing and paste it into a document or presentation.
- Save it as a design to keep editing later. The setup keeps its joints, liquids and tubes.
Tips
- Build from the bottom up: heater, then flask, then adapters and condenser. Each click attaches to the selected piece.
- Zoom in when you fit small pieces such as stoppers and septa.
- Hold Alt to place a piece beside a setup without it snapping on.
- Use the Line style for printed exam papers. It prints sharply in black and white.
- Put the scheme and the setup in one drawing. Learn how to draw the scheme in how to draw benzene, cyclohexane and fused rings.
Everything runs in your browser. The apparatus drawings are part of MolDraw and are not fetched from an outside service.
Questions and answers
Is the apparatus library free?
Yes. All 125 line-art pieces, the Premium shading, snapping, liquids and tubing are free in the MolDraw editor. You do not need an account to draw with them.
How do I stop a piece from snapping?
Hold Alt while you drag. The piece then moves freely and does not snap to nearby joints.
Why does my flask not snap onto the condenser?
Joints only snap when the two openings are within reach and nearly lined up. Drag the flask so its neck is close to the bottom of the condenser and turn it upright if it is tilted. Bottoms only sit on seats such as a heating mantle, a hotplate stirrer or a ring.
Do tubes follow the glassware when I move it?
Yes. A tube end that is fitted on a hose barb stays on that barb when you move, turn, resize or flip the piece. A free end stays where you left it.
Can I change the colour of the liquid?
Yes. Select the vessel and use the format panel to set the liquid colour and opacity, or add a second layer for two immiscible liquids. Drag the small grip on the liquid surface to change the level.
Which formats can I export?
Download the drawing as PNG, SVG or PDF, or copy it to paste into slides, a report or a lab manual.
Does it work on a phone or tablet?
Yes. On a phone the library opens as a full-screen sheet instead of the docked panel. Tap a piece to add it, then drag it into place.